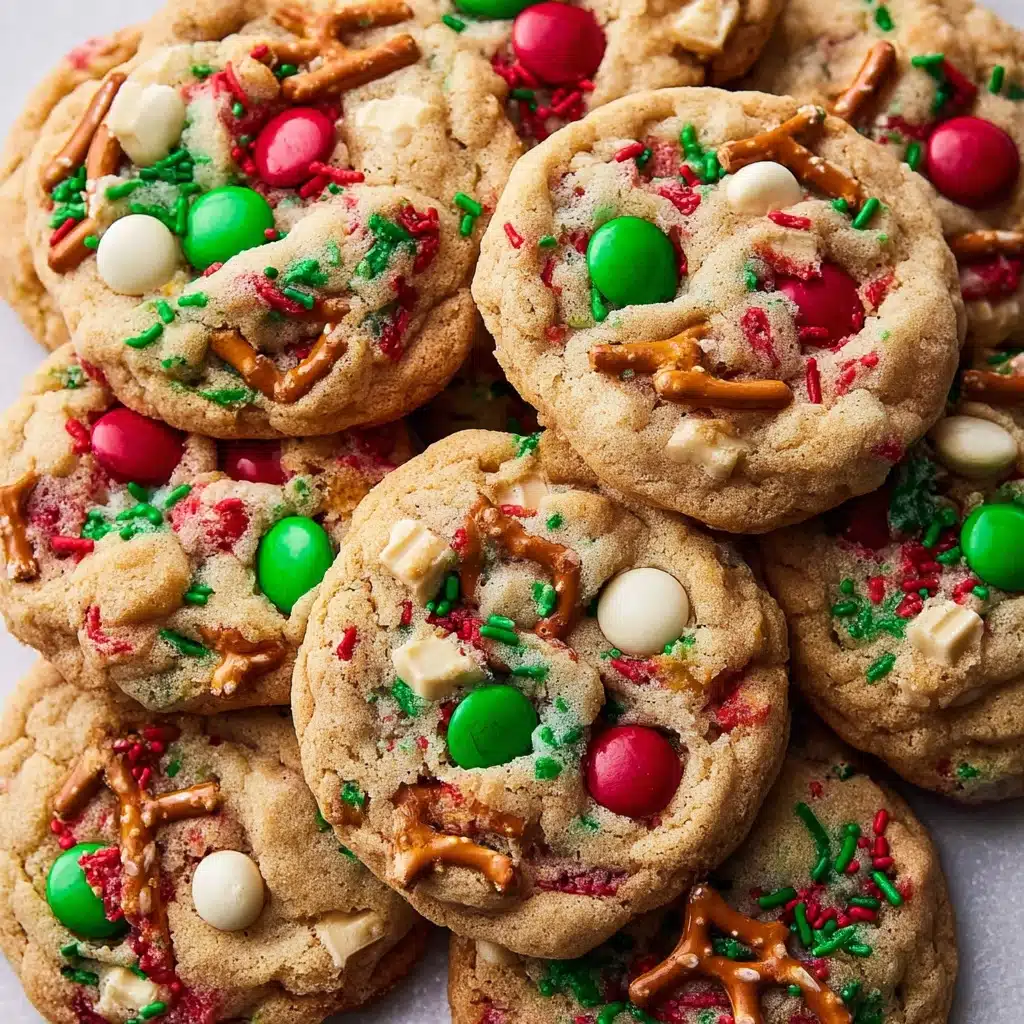
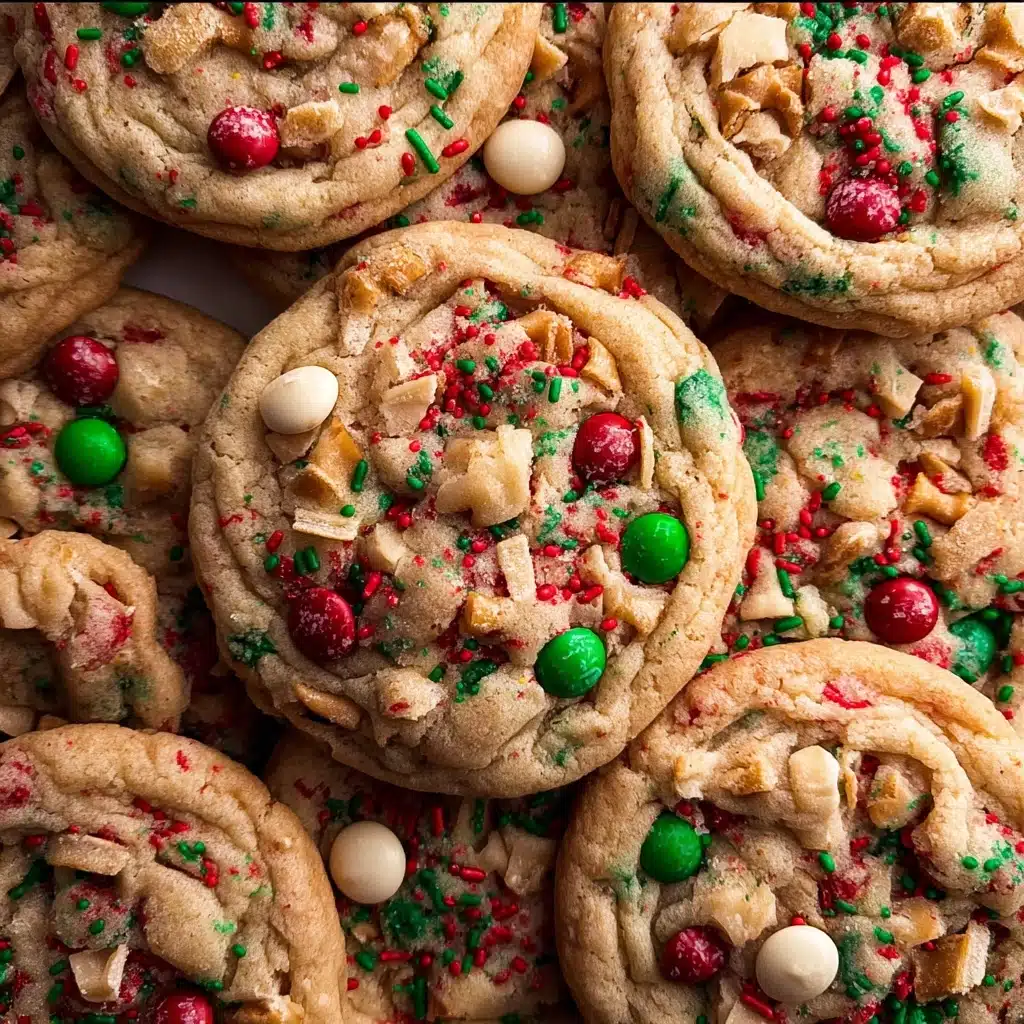
Christmas Kitchen Sink Cookies Recipe
If you’re looking for the ultimate festive treat to impress family and friends this year, Christmas Kitchen Sink Cookies are your golden ticket to celebration bliss. These cookies are not just any cookies—they’re bursting with rich textures and flavors that bring brownies, ice cream, and decadent hot fudge together in one irresistible holiday creation. Every bite is like a warm holiday hug, perfectly combining gooey, cold, and creamy elements that will have everyone asking for seconds. Trust me, this recipe is a standout star in the sea of Christmas desserts and is so fun to make as it brings the spirit of the season right into your kitchen.
Ingredients You’ll Need
To make Christmas Kitchen Sink Cookies, you only need a handful of ingredients, but each one is crucial in crafting those layers of flavor and texture that make this dessert so special. From the fudgy brownie base to the creamy indulgence of ice cream and the rich hit of hot fudge, every component plays a vital role.
- 18.3 oz brownie mix: The foundation of your dessert, choose a mix you love for a moist, chewy brownie base.
- Ice cream (2 pints, flavors of choice): Select your favorite flavors to add a cold, creamy contrast; vanilla, peppermint, or even cookie dough are festive picks.
- Hot fudge sauce (1 cup): This adds a glossy, rich chocolate drizzle that takes your cookies from great to unforgettable.
How to Make Christmas Kitchen Sink Cookies
Step 1: Prepare the Brownie Base
Start by baking the brownie mix according to the directions on the box, using a 9 x 13-inch pan to ensure a thick, chewy base. Once baked, let the brownies cool completely so they’re easier to handle without crumbling.
Step 2: Cut Out Brownie Circles
Using a 6-inch round cutter or a sharp knife, carefully cut two circles out of the cooled brownie slab. These will become the layers that hold your ice cream, providing a sturdy and delicious structure.
Step 3: Layer Ice Cream and Brownies
Place one brownie circle into the bottom of a 6-inch springform pan. Spread one pint of your chosen ice cream flavor evenly over it. Then, top that with the second brownie circle and layer the remaining pint of ice cream on top. This layering creates that classic Christmas Kitchen Sink Cookies texture combo.
Step 4: Freeze and Harden
Cover the assembled dessert with plastic wrap and put it back in the freezer. Let it harden for a few hours or until firm, so the ice cream layers set properly and the flavors meld beautifully.
Step 5: Add the Final Touches Before Serving
About five minutes before serving, take the cake out of the freezer to soften slightly, making it easier to slice and enjoy. Drizzle the entire dessert generously with hot fudge sauce and sprinkle on some leftover brownie pieces for an extra chocolate explosion.
How to Serve Christmas Kitchen Sink Cookies
Garnishes
A sprinkle of crushed peppermint candies or a few festive sprinkles can add just the right holiday flair and a pop of color. Whipped cream is also a lovely light addition that complements the richness without overwhelming the layers.
Side Dishes
Pair these indulgent Christmas Kitchen Sink Cookies with a cup of hot cocoa or warm spiced cider to balance the cold creaminess with cozy warmth. For an adult twist, a small glass of dessert wine or a flavored coffee could be fantastic.
Creative Ways to Present
Serve the cookies on a festive holiday platter with edible gold stars or holly leaves made from sugar paste for an extra special presentation. You could also prepare individual mini versions by layering these ingredients in small ramekins for a fun twist that allows each guest their own festive treat.
Make Ahead and Storage
Storing Leftovers
Keep your Christmas Kitchen Sink Cookies wrapped tightly with plastic wrap or stored in an airtight container in the freezer. This will help preserve the taste and texture for a few days so you can enjoy them later without worry.
Freezing
This dessert is freezer-friendly by nature. You can prepare it well in advance, freeze it until solid, and wrap it securely to avoid freezer burn. When you’re ready to serve, just let it thaw briefly at room temperature.
Reheating
Since this is an ice cream and brownie dessert, reheating isn’t necessary or recommended. Instead, aim for a brief thaw to soften the ice cream slightly for easier slicing and better flavor release.
FAQs
Can I use homemade brownies instead of a mix?
Absolutely! Using your favorite homemade brownie recipe can add an extra personal touch and customize the texture and flavor exactly how you like it.
What ice cream flavors work best?
Classic vanilla, peppermint, chocolate chip, or even festive flavors like eggnog and gingerbread work beautifully to complement the rich brownie and fudge layers.
Can I make this dessert without a springform pan?
If you don’t have a springform pan, a small cake pan or even a deep dish pie plate could work; just be mindful to layer carefully and manage the removal and serving with care.
How long should I freeze the dessert before serving?
Freezing for at least 4 hours or overnight is ideal to ensure the ice cream layers set firmly and the dessert holds together when sliced.
Is this dessert suitable for large crowds?
You can easily multiply the recipe or bake in larger pans to serve more people; just scale ingredients accordingly and adjust freezing time for thicker layers.
Final Thoughts
Christmas Kitchen Sink Cookies truly capture the magic of the holiday season with every rich, creamy, and fudgy bite. They bring together the best elements of your favorite desserts into one joyful creation that’s as fun to make as it is to eat. I can’t wait for you to try this recipe and share these cozy, festive delights with your loved ones—because nothing says holiday cheer quite like this show-stopping treat!
PrintChristmas Kitchen Sink Cookies Recipe

These Christmas Kitchen Sink Cookies are a delightful and indulgent dessert that combines rich homemade brownies layered with your favorite ice cream flavors and topped with hot fudge sauce. Perfect for holiday gatherings, this no-fuss treat offers a delicious blend of fudgy brownie texture and creamy ice cream, creating a festive and crowd-pleasing dessert.
- Prep Time: 20 minutes
- Cook Time: 25 minutes
- Total Time: 6 hours 45 minutes (including freezing time)
- Yield: 8 servings 1x
- Category: Dessert
- Method: Baking and Freezing
- Cuisine: American
- Diet: Vegetarian
Ingredients
Brownie Layer
- 1 (18.3 oz) brownie mix, prepared according to package directions
Ice Cream Layer
- 2 pints of ice cream, flavors of your choice
Topping
- 1 cup hot fudge sauce
- Additional brownie pieces for garnish (optional)
Instructions
- Prepare the Brownies: Bake the brownie mix in a 9 x 13 inch pan following the instructions on the package. Once baked, allow the brownies to cool completely.
- Cut Brownie Circles: Use a 6-inch round cutter or a similar sized tool to cut two circles from the cooled brownies.
- Layer First Brownie and Ice Cream: Place one brownie circle at the bottom of a 6-inch springform pan. Spread one pint of ice cream evenly over the brownie layer.
- Layer Second Brownie and Ice Cream: Add the second brownie circle on top of the ice cream, then spread the remaining pint of ice cream evenly over this layer.
- Freeze and Harden: Cover the springform pan with plastic wrap and freeze the layered dessert until the ice cream is firm, ideally for several hours or overnight.
- Prepare for Serving: Remove from the freezer 5 minutes before serving to allow it to soften slightly, making it easier to slice.
- Add Toppings and Serve: Drizzle the hot fudge sauce over the top and sprinkle with leftover brownie pieces if desired. Slice and serve chilled for a rich, festive dessert experience.
Notes
- For best results, use a high-quality brownie mix or homemade brownie batter.
- Choose ice cream flavors that complement each other, such as chocolate and peppermint or vanilla and cinnamon, to enhance the holiday spirit.
- Allow the assembled dessert to freeze at least 4-6 hours to ensure firm layering and easier slicing.
- Ensure you soften the dessert slightly before serving to get clean slices without cracking the brownies.
- This dessert can be made a day ahead and stored in the freezer for convenience.
Nutrition
- Serving Size: 1 slice (approx. 1/8 of the recipe)
- Calories: 420 kcal
- Sugar: 35 g
- Sodium: 210 mg
- Fat: 22 g
- Saturated Fat: 12 g
- Unsaturated Fat: 8 g
- Trans Fat: 0.5 g
- Carbohydrates: 50 g
- Fiber: 3 g
- Protein: 5 g
- Cholesterol: 50 mg
Keywords: Christmas dessert, brownie ice cream cake, holiday cookies, layered dessert, kitchen sink cookies, festive treat