Healthy Homemade Butterfingers Recipe
Introduction
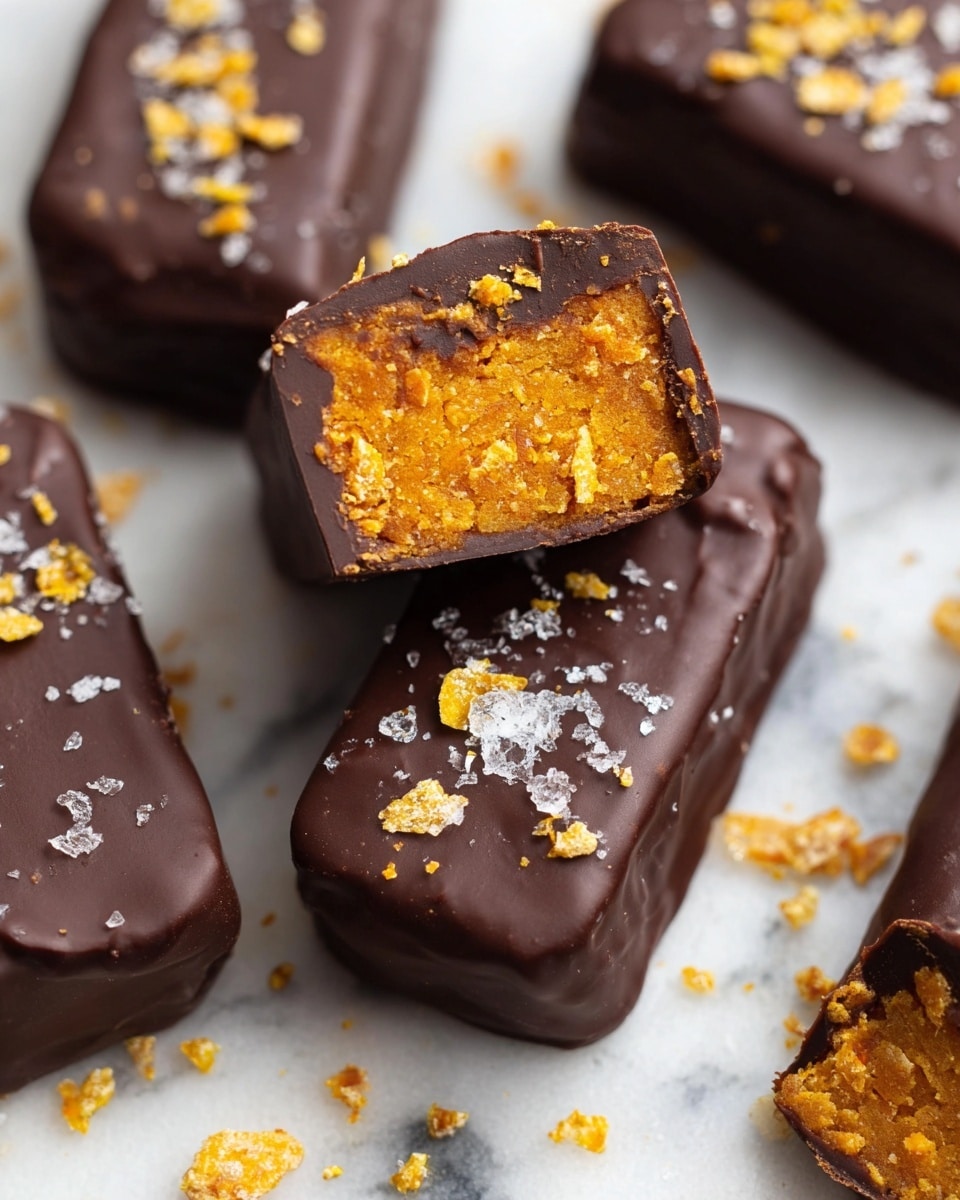
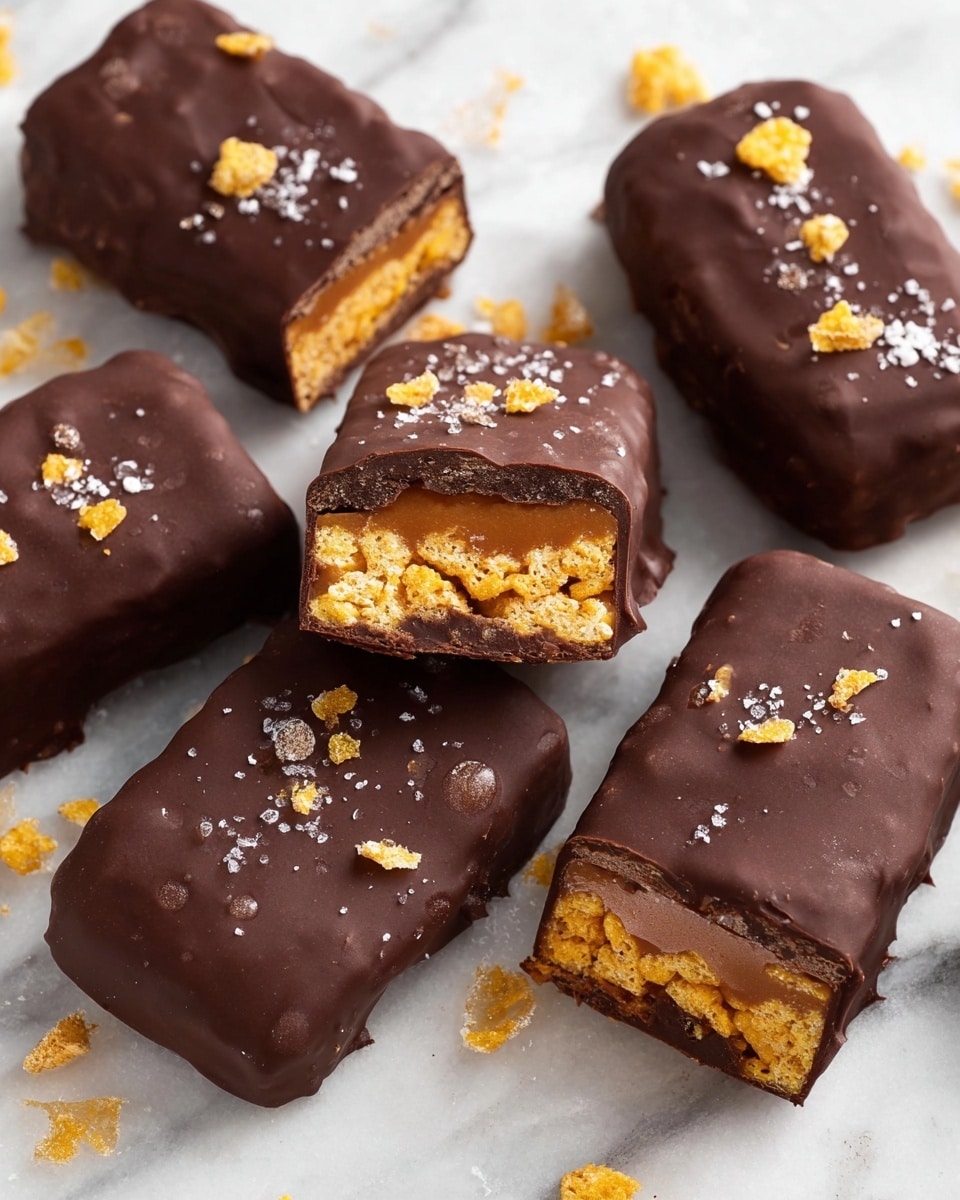
These Healthy Homemade Butterfingers are a deliciously crunchy and chocolatey treat made with simple, wholesome ingredients. Perfect for a guilt-free snack, they combine peanut butter, corn flakes, and a smooth chocolate coating for a delightful texture and taste.
Ingredients
- 1 cup peanut butter
- 1/3 cup maple syrup or honey
- 2 cups corn flakes
- 1 cup chocolate chips
- 2 teaspoons coconut oil
Instructions
- Step 1: Add the corn flakes to a large zip-top bag, seal the bag, and crush the cereal into small pieces.
- Step 2: In a large bowl, mix the peanut butter and maple syrup or honey together until well combined. Add the crushed corn flakes and stir to fully combine.
- Step 3: Line a loaf pan with parchment paper and transfer the mixture into it. Press down evenly to form a flat layer. Place the pan in the freezer and let it harden for at least 1 hour.
- Step 4: Remove the pan from the freezer and carefully lift the mixture out using the parchment paper. Place it on a cutting board and cut into 12 bars.
- Step 5: Melt the chocolate chips and coconut oil together, whisking until smooth. Dip each bar into the melted chocolate to coat fully. Set the coated bars on a parchment-lined plate.
- Step 6: Return the bars to the freezer for about 10 minutes or until the chocolate has hardened. Enjoy immediately or store for later.
Tips & Variations
- For a nut-free version, substitute peanut butter with sunflower seed butter.
- Use dark chocolate chips for a richer flavor and added antioxidants.
- Press the mixture firmly into the pan to help the bars hold together better.
Storage
Store the coated butterfinger bars in an airtight container in the freezer for up to 3 months. When ready to eat, you can enjoy them straight from the freezer or let them sit at room temperature for a few minutes to soften slightly.
How to Serve
Serve this delicious recipe with your favorite sides.
FAQs
Can I use regular syrup instead of maple syrup or honey?
Maple syrup or honey work best because of their natural sweetness and texture. Regular syrup may make the mixture too sticky or alter the flavor.
Is it necessary to freeze the bars?
Yes, freezing helps the bars to harden and hold their shape, making them easier to cut and coat with chocolate.
PrintHealthy Homemade Butterfingers Recipe
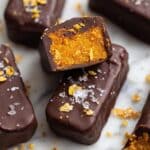
These Healthy Homemade Butterfingers are a delicious and nutritious take on the classic candy bar. Made with peanut butter, corn flakes, and sweetened naturally with maple syrup or honey, they’re coated in rich melted chocolate for a perfect balance of crunchy, sweet, and creamy textures. Easy to prepare without baking, these bars make a great guilt-free snack or treat to satisfy your sweet tooth while keeping ingredients wholesome.
- Prep Time: 15 minutes
- Cook Time: 10 minutes (melting chocolate)
- Total Time: 1 hour 25 minutes
- Yield: 12 bars 1x
- Category: Snack
- Method: No-Cook
- Cuisine: American
- Diet: Vegetarian
Ingredients
Main Ingredients
- 1 cup peanut butter
- 1/3 cup maple syrup or honey
- 2 cups corn flakes
- 1 cup chocolate chips
- 2 teaspoons coconut oil
Instructions
- Crush the Corn Flakes: Add the corn flakes to a large zip-top bag, seal it tightly, and crush the cereal into small pieces using your hands or a rolling pin to create a crunchy base.
- Mix Peanut Butter and Sweetener: In a large bowl, combine the peanut butter with the maple syrup or honey, stirring until fully blended into a smooth mixture.
- Combine with Corn Flakes: Add the crushed corn flakes into the peanut butter and sweetener mixture. Stir thoroughly to make sure every bit of cereal is coated and mixed well to form a sticky, textured base.
- Press Mixture into Pan: Line a loaf pan with parchment paper. Transfer the mixture into the pan and press firmly down to create an even and compact layer. Place the pan in the freezer for at least 1 hour to let it harden.
- Cut into Bars: Once firm, remove the pan from the freezer and carefully lift the hardened mixture out using the parchment paper. Place it onto a cutting board and cut into 12 equal bars.
- Melt Chocolate Coating: In a microwave-safe bowl or over a double boiler, melt the chocolate chips together with the coconut oil. Whisk the melted mixture until smooth and glossy.
- Coat Each Bar: Dip each butterfinger bar into the melted chocolate, ensuring it is fully coated. Allow excess chocolate to drip off, then place the coated bars on a parchment-lined plate.
- Freeze to Set Chocolate: Transfer the coated bars back to the freezer for about 10 minutes or until the chocolate hardens completely.
- Serve or Store: Enjoy the butterfingers immediately or keep them stored in an airtight container in the freezer for up to 3 months for best freshness.
Notes
- For crunchier bars, use crisp corn flakes and avoid over-crushing them.
- You can substitute peanut butter with any nut or seed butter for different flavors.
- Use pure maple syrup or raw honey depending on your preferred sweetener and dietary needs.
- Ensure chocolate is fully melted but not overheated to avoid burning.
- Store bars in the freezer as they can get soft at room temperature due to peanut butter and syrup.
- You can add a pinch of salt in the peanut butter mixture to enhance the flavor if desired.
Keywords: Healthy Butterfingers, Homemade Candy Bars, Peanut Butter Snack, No Bake Treat, Gluten Free Candy