Healthy Pumpkin Truffles Recipe
Introduction
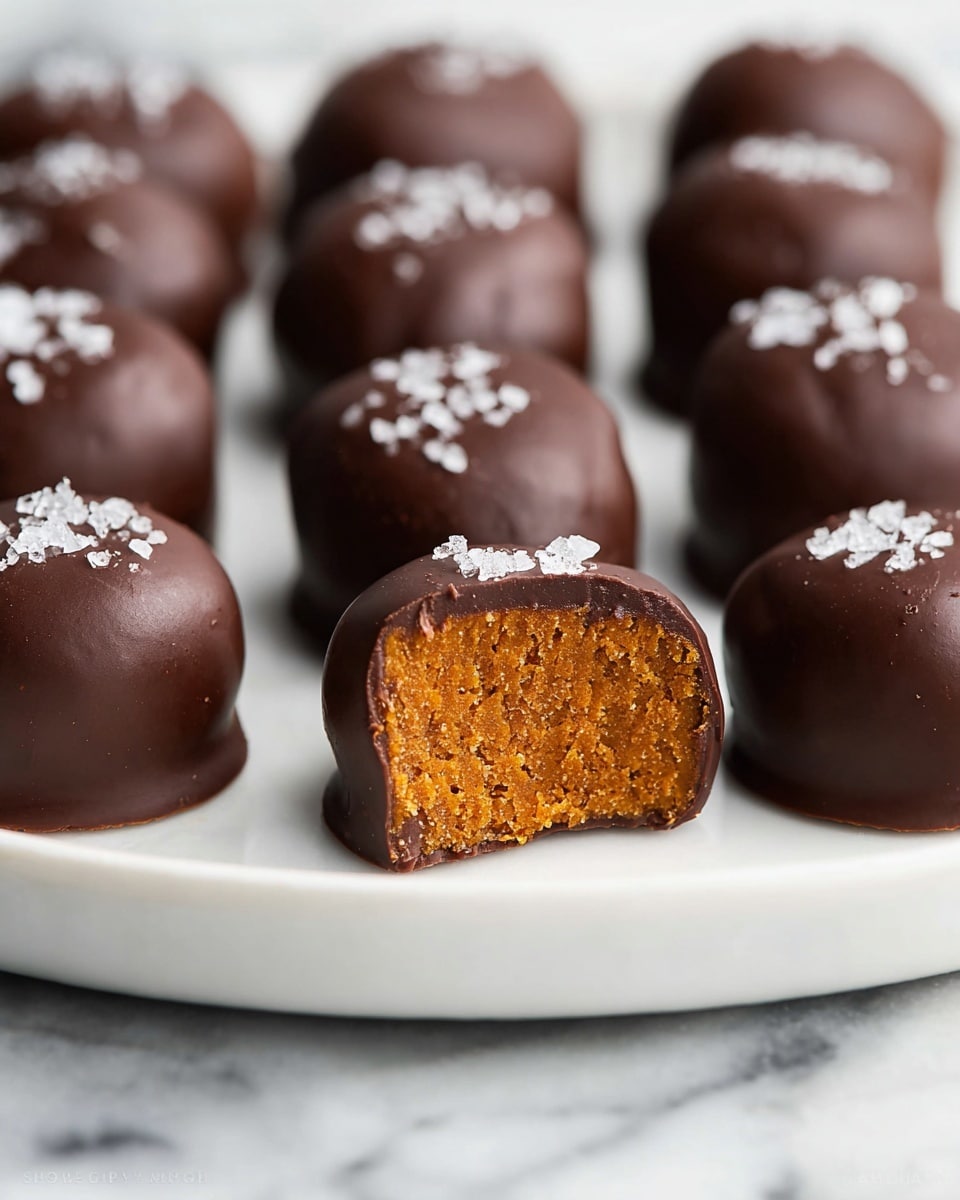
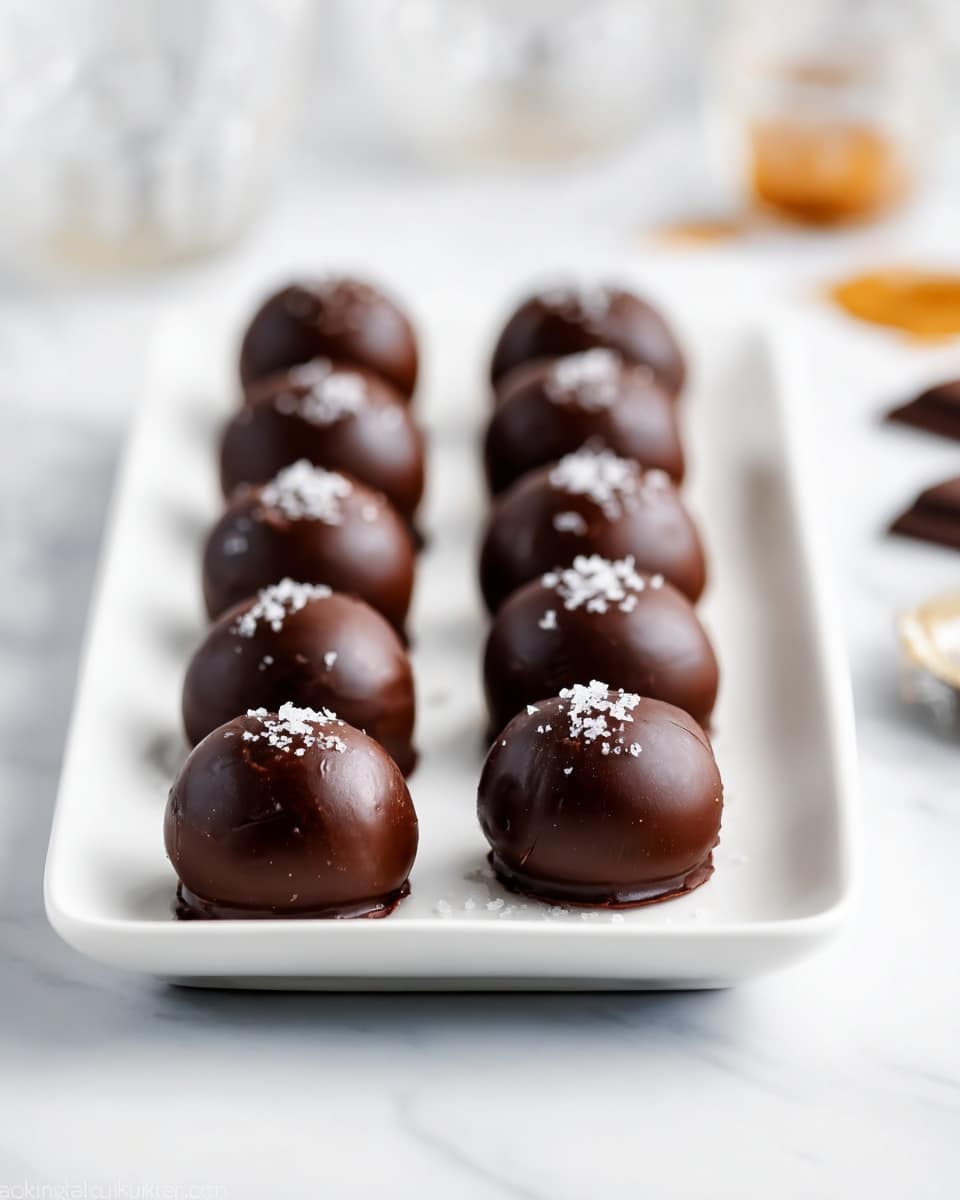
These Healthy Pumpkin Truffles are a delightful fall treat that combines creamy pumpkin flavor with rich dark chocolate. They’re easy to make, naturally sweetened, and perfect for a guilt-free indulgence anytime.
Ingredients
- ½ cup (122g) pumpkin purée (NOT pumpkin pie mix!)
- 1 ¼ tsp homemade pumpkin spice (see Notes!)
- ⅛ tsp salt
- ¾ tsp liquid stevia (or adjusted to taste)
- ¾ cup (90g) oat flour (gluten free if necessary and measured like this)
- ¼ cup (54g) roughly chopped dark chocolate (see Notes!)
- Optional: flaky sea salt (for finishing – highly recommended!)
Instructions
- Step 1: Place a sheet of wax paper or parchment paper on a baking tray to prepare for the truffles.
- Step 2: In a medium bowl, stir together the pumpkin purée, pumpkin spice, salt, and liquid stevia until well combined. Add the oat flour and mix until just incorporated.
- Step 3: Working with a small portion of the mixture at a time, roll it into bite-sized spheres. Place each sphere on the prepared baking sheet. If the mixture sticks to your hands, rub your fingers and palms with a little neutral-tasting oil.
- Step 4: Place the dark chocolate in a microwave-safe bowl and microwave on HIGH for 30 seconds. Stir for 1 minute. Continue microwaving in 10-second intervals, stirring for 1 minute between each, until the chocolate is fully melted. Keep warm while assembling the truffles.
- Step 5: Dip each pumpkin sphere into the melted chocolate using two forks, letting excess chocolate drip off. Place the dipped truffle back on the wax paper. If desired, sprinkle flaky sea salt on top immediately.
- Step 6: Once all truffles are coated, place the tray in the freezer for 5-10 minutes or the refrigerator for 15-20 minutes until the chocolate hardens. Store truffles in the refrigerator until ready to serve.
Tips & Variations
- Use gluten-free oat flour to make this recipe suitable for gluten sensitivity or celiac disease.
- Adjust the amount of liquid stevia to your preferred sweetness level.
- For a richer taste, try dipping the truffles in bittersweet or semi-sweet chocolate according to your preference.
- Keep the melted chocolate warm by placing the bowl over a pot of warm water while coating the truffles.
- Flaky sea salt on top enhances the flavors by balancing sweetness and adding a pleasant crunch.
Storage
Store the pumpkin truffles in an airtight container in the refrigerator for up to one week. For longer storage, freeze them for up to one month. Allow refrigerated truffles to come to room temperature for a few minutes before enjoying, or gently warm frozen truffles in the fridge overnight before serving.
How to Serve
Serve this delicious recipe with your favorite sides.
FAQs
Can I use canned pumpkin pie filling instead of pumpkin purée?
No, it’s important to use plain pumpkin purée. Pumpkin pie filling contains added sugar and spices that will alter the flavor and texture of the truffles.
What can I use if I don’t have liquid stevia?
You can substitute liquid stevia with another natural sweetener like maple syrup or honey, but note that this may change the consistency slightly. Adjust quantities to taste.
PrintHealthy Pumpkin Truffles Recipe

These Healthy Pumpkin Truffles are a delicious, guilt-free treat combining creamy pumpkin purée with warm pumpkin spice and rich dark chocolate. Made with oat flour and sweetened naturally with liquid stevia, these bite-sized spheres are easy to make, gluten-free, and perfect for a festive snack or dessert that satisfies your sweet tooth without the guilt.
- Prep Time: 15 minutes
- Cook Time: 10 minutes
- Total Time: 25 minutes
- Yield: 24 truffles 1x
- Category: Dessert
- Method: No-Cook
- Cuisine: American
- Diet: Gluten Free
Ingredients
Main Ingredients
- ½ cup (122g) pumpkin purée (NOT pumpkin pie mix!)
- 1 ¼ tsp homemade pumpkin spice (see Notes!)
- ⅛ tsp salt
- ¾ tsp liquid stevia (or adjusted to taste)
- ¾ cup (90g) oat flour (gluten free if necessary and measured like this)
- ¼ cup (54g) roughly chopped dark chocolate (see Notes!)
- Optional: flaky sea salt (for finishing – highly recommended!)
Instructions
- Prepare the workspace: Place a sheet of wax paper or parchment paper on a baking tray to set the truffles on after forming and dipping.
- Mix the filling: In a medium bowl, stir together the pumpkin purée, homemade pumpkin spice, salt, and liquid stevia until well combined. Then add the oat flour and stir just until incorporated to form the truffle mixture.
- Form the truffles: Take a small portion of the mixture and roll it between your fingers and palms (lightly oiled to prevent sticking if necessary) into bite-sized spheres. Place each sphere on the prepared baking sheet. Repeat with the remaining mixture until you have about 24 truffles.
- Melt the chocolate: Place the roughly chopped dark chocolate into a microwave-safe bowl. Microwave on HIGH for 30 seconds, then stir for 1 minute. Continue heating in 10-second intervals, stirring for 1 minute between each, until the chocolate is fully melted and smooth. Keep the chocolate warm while assembling the truffles.
- Dip the truffles: Using two forks, carefully dip each pumpkin sphere into the melted chocolate, rocking between the forks to allow excess chocolate to drip off. Place the coated truffle back onto the wax paper. If desired, sprinkle a pinch of flaky sea salt on top immediately after dipping. Repeat for all truffles.
- Set the chocolate coating: Place the coated truffles in the freezer for 5-10 minutes or in the refrigerator for 15-20 minutes until the chocolate hardens.
- Store and serve: Keep the truffles refrigerated until ready to eat to maintain freshness and firmness.
Notes
- Use pure pumpkin purée, not pumpkin pie mix, to avoid added sugars and spices that can alter the flavor.
- Homemade pumpkin spice typically includes cinnamon, nutmeg, ginger, and cloves. Adjust quantities to taste.
- Choose good quality dark chocolate (70% cocoa or higher is ideal) for dipping to balance sweetness and richness.
- To prevent sticking when rolling the truffles, rub your fingers and palms with a neutral-tasting oil like coconut or grapeseed oil.
- The flaky sea salt enhances the chocolate flavor and adds a pleasing crunch contrast.
Keywords: healthy pumpkin truffles, pumpkin dessert, gluten free pumpkin snacks, no bake truffles, healthy fall treats, pumpkin spice, dark chocolate truffles